


You don’t notice a cabinet finish when it’s done well.
You notice it when it starts failing.
A small chip near the handle.
A worn edge by the sink.
A patch that looks dull no matter how much you wipe it.
At that point, it’s easy to blame the paint. Or the color. Or even the cabinets themselves.
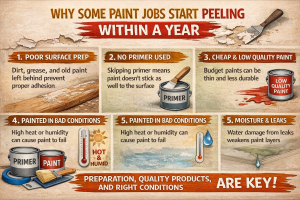
But chipping rarely starts with the finish you see. It starts with everything that happened before it.
Where Cabinet Chipping Actually Begins
Most cabinet surfaces fail in the same places.
Edges. Corners. Around hardware. Near moisture.
Those are high-contact areas. They take the most friction and the most stress. If the finish underneath isn’t built properly, it breaks down early.
This isn’t about bad luck. It’s about how the surface was handled before the first coat ever went on.
In many kitchens, the problem starts with shortcuts. Light sanding. Incomplete cleaning. Coatings applied too quickly. It looks fine at first, but the surface never really bonds the way it should.
That’s why cabinets can look good for a few months and then suddenly start chipping in the same predictable spots.
The Problem With “Paint-Over” Jobs
A lot of cabinet work is treated like wall painting.
Clean it quickly. Sand lightly. Apply paint. Move on.
That approach doesn’t hold up on cabinets.
Cabinets deal with grease, moisture, and constant handling. The surface needs to be stable before anything goes on top of it. If residue is left behind or the previous finish isn’t properly prepared, the new coating sits on top instead of bonding into the surface.
Once that happens, wear shows up fast.
You’ll see it first where your hands go most often. The paint lifts slightly. Then chips. Then spreads.
This is where the difference between basic painting and proper cabinet refinishing and painting starts to show.
Why Edges Fail First
Flat panels usually hold up longer.
Edges don’t.
Edges take more contact, but they also tend to get less attention during prep. Sanding is inconsistent. Coating builds up unevenly. Sometimes it’s too thin. Sometimes too heavy.
When that balance is off, edges become the weak point.
Over time, that’s where chipping begins.
A properly finished cabinet treats edges differently. They’re not rushed. They’re not overloaded with material. They’re built up in a controlled way so the finish can handle wear without breaking.
Moisture Changes Everything
Kitchens are not neutral environments.
Steam. Spills. Cleaning products. Daily use.
All of that affects how coatings behave.
Under-sink cabinets are a common example. Even minor moisture exposure over time can weaken the surface if it hasn’t been sealed and finished correctly. The same goes for areas near stoves and dishwashers.
When coatings aren’t designed or applied for that environment, they start to fail from underneath.
That’s why durability isn’t just about the paint itself. It’s about the system behind it.
The Role of Preparation
Preparation doesn’t get talked about much because you don’t see it.
But it’s where most cabinet finishes either succeed or fail.
A proper process takes time:
- Surfaces are cleaned thoroughly, not just wiped down
- Existing finishes are properly scuffed or leveled
- Problem areas are addressed before any coating is applied
- The surface is made consistent so the finish behaves the same across every panel
When this part is rushed, everything that follows is compromised.
That’s why well-executed cabinet painting & refinishing services feel different. The finish sits correctly. It doesn’t fight the surface underneath.
Application Matters More Than People Think
Even with good preparation, application can still make or break the result.
Too thick, and the coating becomes brittle.
Too thin, and it wears through quickly.
Rushed dry times create weak layers that don’t fully cure.
A durable finish is built in stages. Each layer needs time to settle and bond before the next one goes on.
That’s not always visible to the homeowner. But you feel it later, when the cabinets hold up instead of breaking down in patches.
Why Some Cabinets Last Years and Others Don’t
Two kitchens can be painted the same week and age completely differently.
One still looks consistent after years of use.
The other starts showing wear within months.
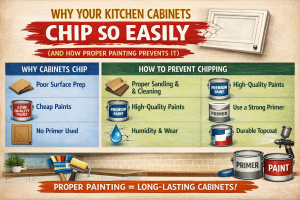
The difference usually comes down to three things:
- how the surface was prepared
- how the coatings were applied
- how much time was allowed for proper curing
It’s not about using the most expensive paint. It’s about using the right process and respecting each step.
That’s the gap between a quick update and a finish that actually lasts.
What to Look For Before Repainting Cabinets
If you’re considering repainting, it’s worth taking a closer look at what’s already there.
Run your hand along the edges.
Check around handles and high-use areas.
Look for early signs of lifting or uneven sheen.
If the current finish is already failing, painting over it without correcting the base will only repeat the problem.
This is where experienced kitchen cabinet refinishing services near Ada tend to approach things differently. The goal isn’t just to change the color. It’s to correct what caused the failure in the first place.
The Real Difference
Cabinet chipping isn’t random.
It’s predictable. It follows patterns. It shows up where the process was weakest.
When cabinets are handled properly, those weak points are addressed before they become visible. The finish holds. The wear is even. The surface stays consistent.
You don’t think about it.
And that’s usually the sign it was done right.